Connecting the Cart administration
Cart’s administration side of the store is where you can modify features, upload images, add products, keep track of customers, manage payments, and much more. Customization in the admin affects how the customer will interact with a store: by modifying the look, structure, and content of the store front.
Accessing the admin panel
To access the admin panel, type in location of the store into the web browser followed by “/admin”. For example, if your store is located at “www.chocolatechip.com”, your admin panel is located at “www.chocolatechip.com/admin”. Even if the store is located in a sub-folder or on a sub-domain of their site, adding “/admin” to the end of the store’s path will lead you to the administration side.
If the name of the folder is changed by you during installation, the location of the admin panel is changed to that new name. For example, if the name of the admin folder is changed to admin1, the new location of the admin panel is at “www.chocolatchip.com/admin1”. Changing the name of the admin folder to another name is important for improving an online shop’s security. The config.php file needs to be edited to indicate the correct file path and location.
A username and password is created in Step 3 of the auto-installer during installation. This information can now be used to fill in the administrator login details.
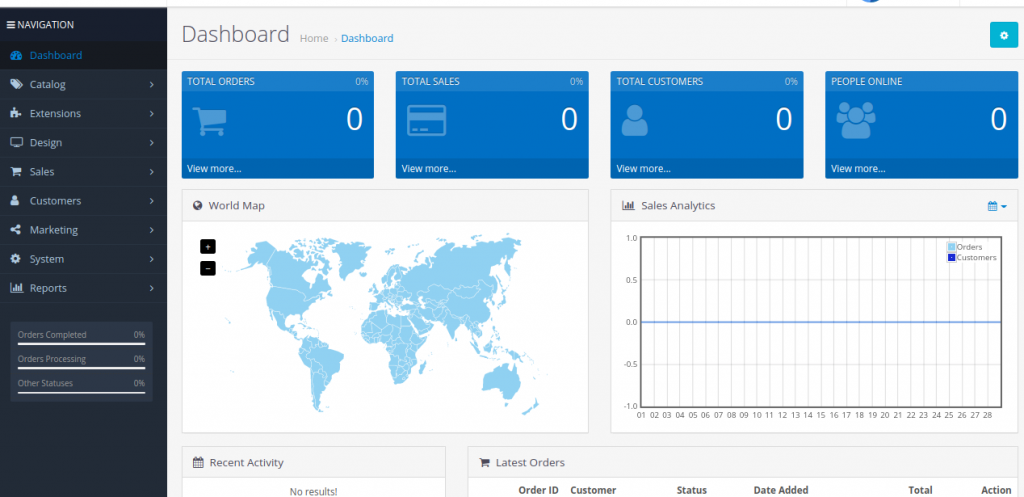
After filling in the correct username and password, pressing the “Login” button will direct you to the Cart dashboard. When you first login to your shop, the dashboard will be blank (as seen below), because there isn’t any statistical data to be analyzed yet.

Entering the administration through the Dashboard
The dashboard is the first thing you will see when entering Cart’s admin. The main function of the dashboard is to give the shop owner an overview of how the shop is performing. There are 3 sections of the dashboard that can help you understand the statistical data collected by your store:
- Overview:There are four chart showing the status of your website. They are Total Orders, Total sales, Total Customers and People Online which help you to easier to know the analytics.
- World Map:A world map to show where the orders from your website were coming from.
- Sales Analytics:A graph is provided to track the chronological progress of the store relative to the amount of orders and customers over time. The x value is time; which can be hours, days, or months depending on the range selected. The y value displays the number of total orders(yellow) and total customers(blue).
- Recent Activity:A section to check the recent activity from any customer from your store such as login, creating account or placing new orders.
- Latest Orders:A list that displays the last orders and their details (“Order ID”, “Customer”, “Status”, “Date Added”, “Total”, and “Action”)
Above the dashboard in the top menu is the administration navigation. You can navigate between the “Catalog”, “Extensions”, “Sales”, “System”, “Reports”, and “Help”. These sections will be explained in further detail in the following sections of the User Guide.


